
2024-11-11
Setting Up Visual Studio Code (VSCode)
In this section, we will explain the necessary VSCode settings to start programming with p5.js. We assume that VSCode is already installed.
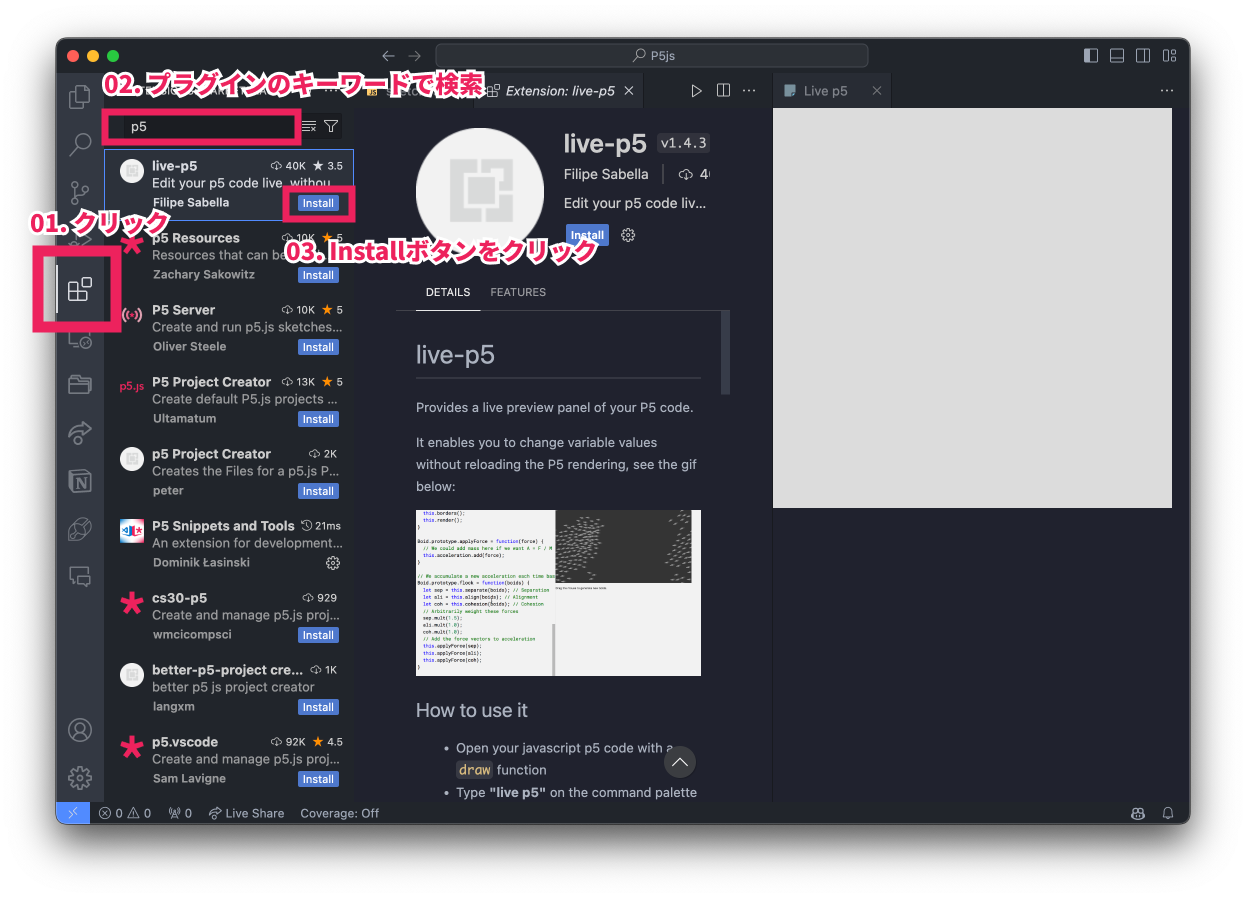
1. Installing Plugins
To use p5.js effectively in VSCode, install the following plugins. You can install plugins from the VSCode extension marketplace.
- P5 Snippets and Tools: Provides snippets and tools for p5.js.
- live-p5: Provides live preview for p5.js sketches.
- Live Preview: Allows real-time preview of HTML files.
- Prettier - Code formatter: Automatically formats your code.
- Code Runner: A plugin that allows you to easily run code.
Refer to the image below for the plugin installation method.
To Enable Code Runner
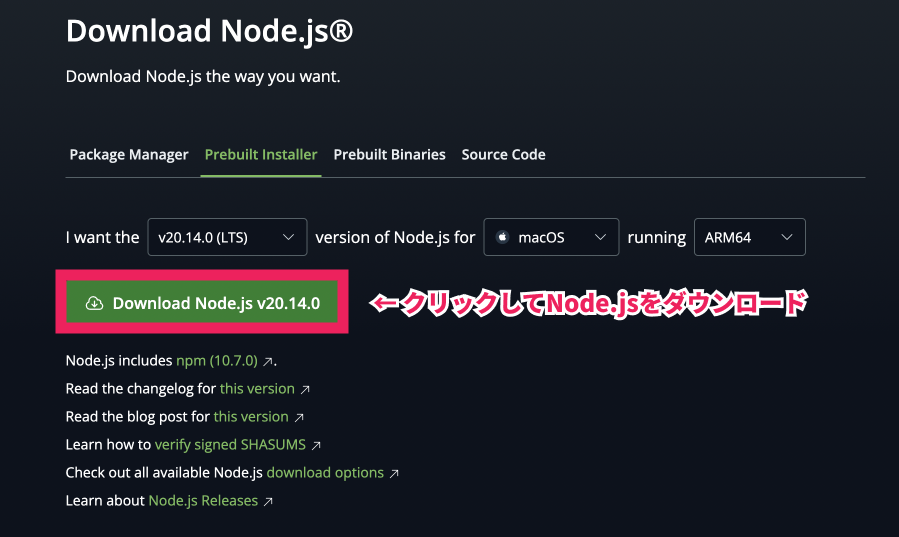
To use the Code Runner plugin, you need to install Node.js. Follow the steps below to install Node.js.
- Access the official Node.js website and download the installer.
- Navigate to the
Downloadsfolder and double-click the file namednode-v20.14.0-arm64.msito launch the installer. Follow the instructions to proceed with the installation.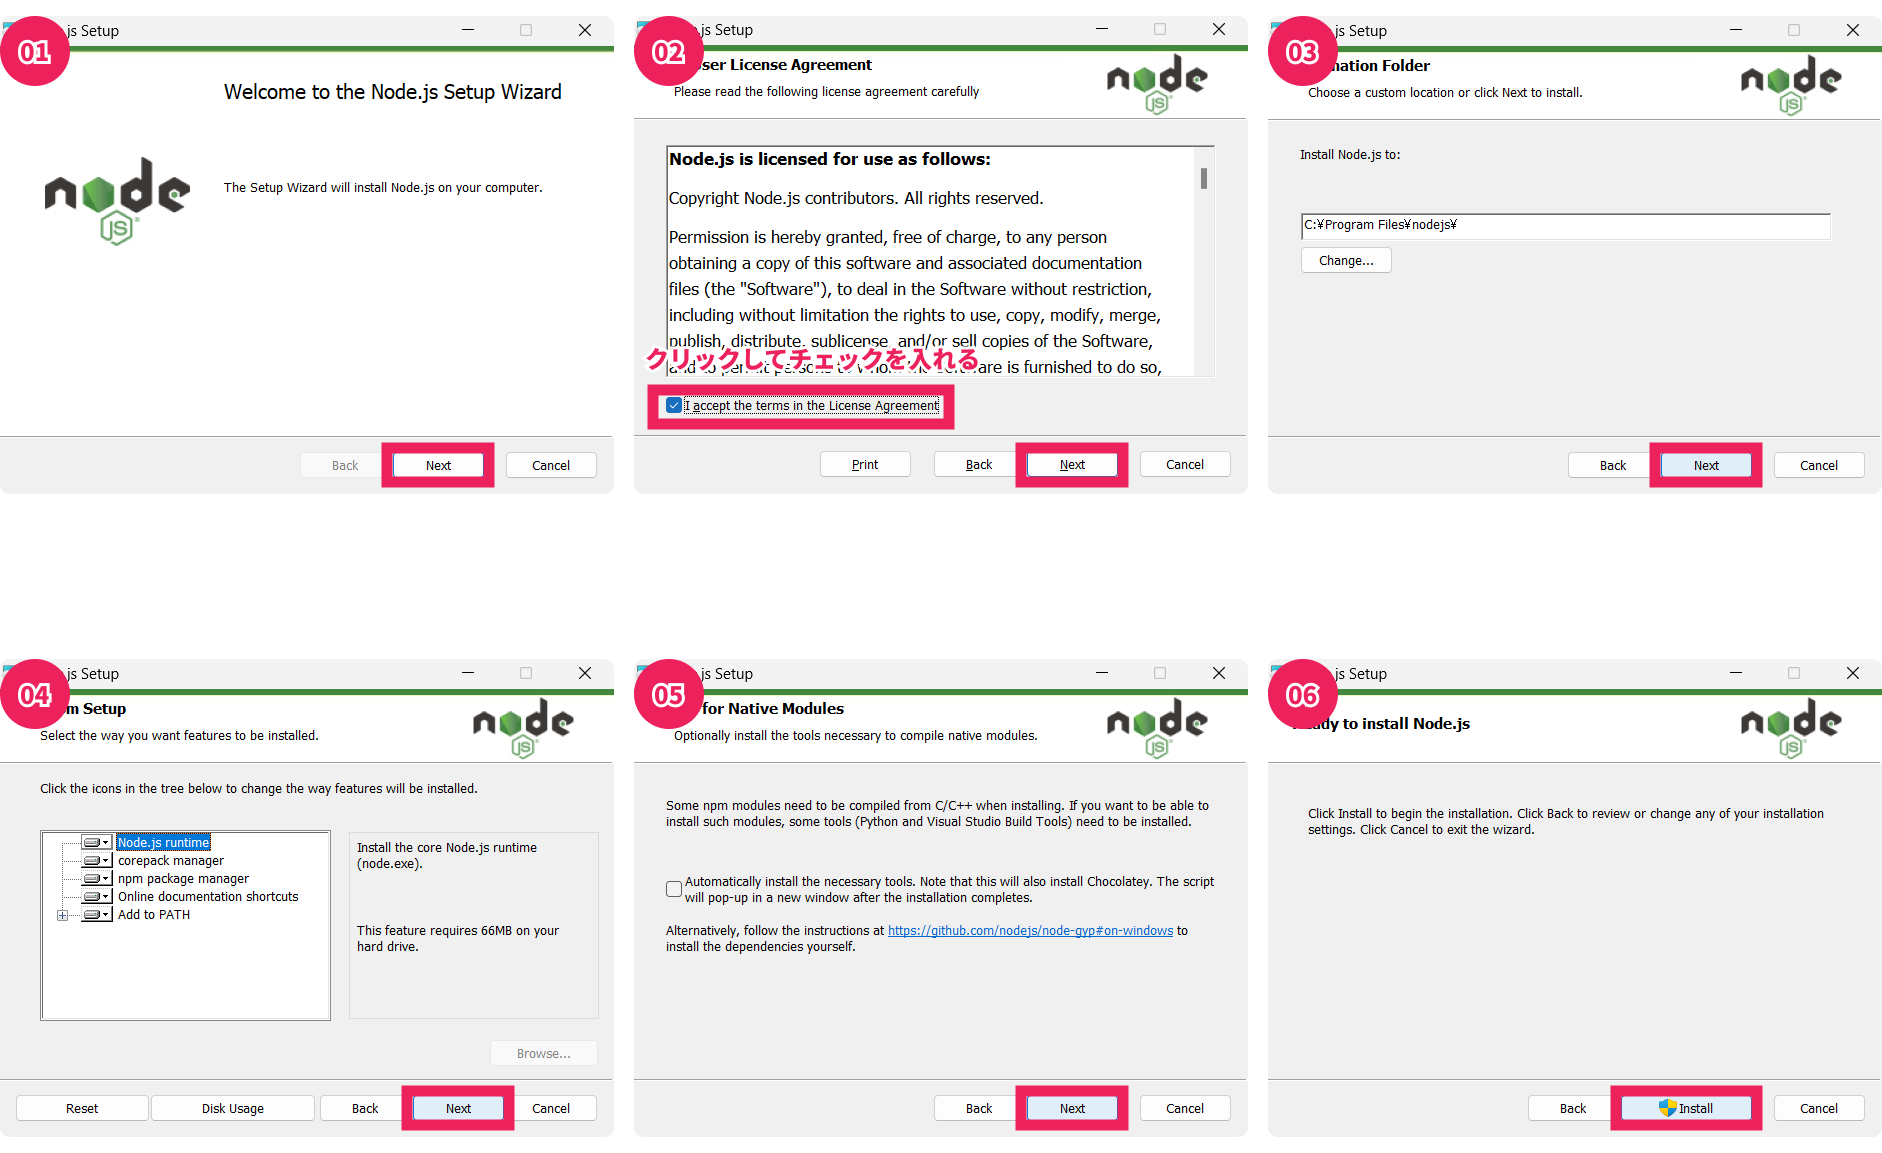
- Once the installation is complete, restart VSCode.
2. Configuring Settings.json
Adjust the user settings in VSCode to make coding more comfortable. Add the following settings to the User Settings.json.
- Open VSCode settings (
Ctrl + ,orCmd + ,). - Click the
{}icon at the top right of the settings screen to open the settings file (settings.json). - Add the following settings.
{
    "editor.formatOnSave": true,
    "editor.defaultFormatter": "esbenp.prettier-vscode",
    "editor.tabSize": 4,
    "prettier.tabWidth": 4
}
3. Creating a p5.js Working Folder
First, create a folder for your p5.js project. Follow the steps below to create the folder.
- Navigate to the
studentsfolder. - Create a new folder named
p5js.
The folder structure will be as follows:
|- students
|- p5js- Open the
p5jsfolder in VSCode. With VSCode open, pressCtrl + Kand thenCtrl + O, and select thep5jsfolder to open it.
4. Running Your First Code
Assuming you have completed all the previous steps and have the p5js folder open in VSCode, we will proceed. The following steps for "Creating a p5.js Project" and "Displaying the p5.js Live Preview" are steps you will perform each time you create a new project, so make sure to remember them.
Creating a p5.js Project
- Open the command palette with
Ctrl + Shift + P. - Type
Create a standard p5.js project(you can typecreateand the command will appear in the suggestions). Select the command by pressing Enter.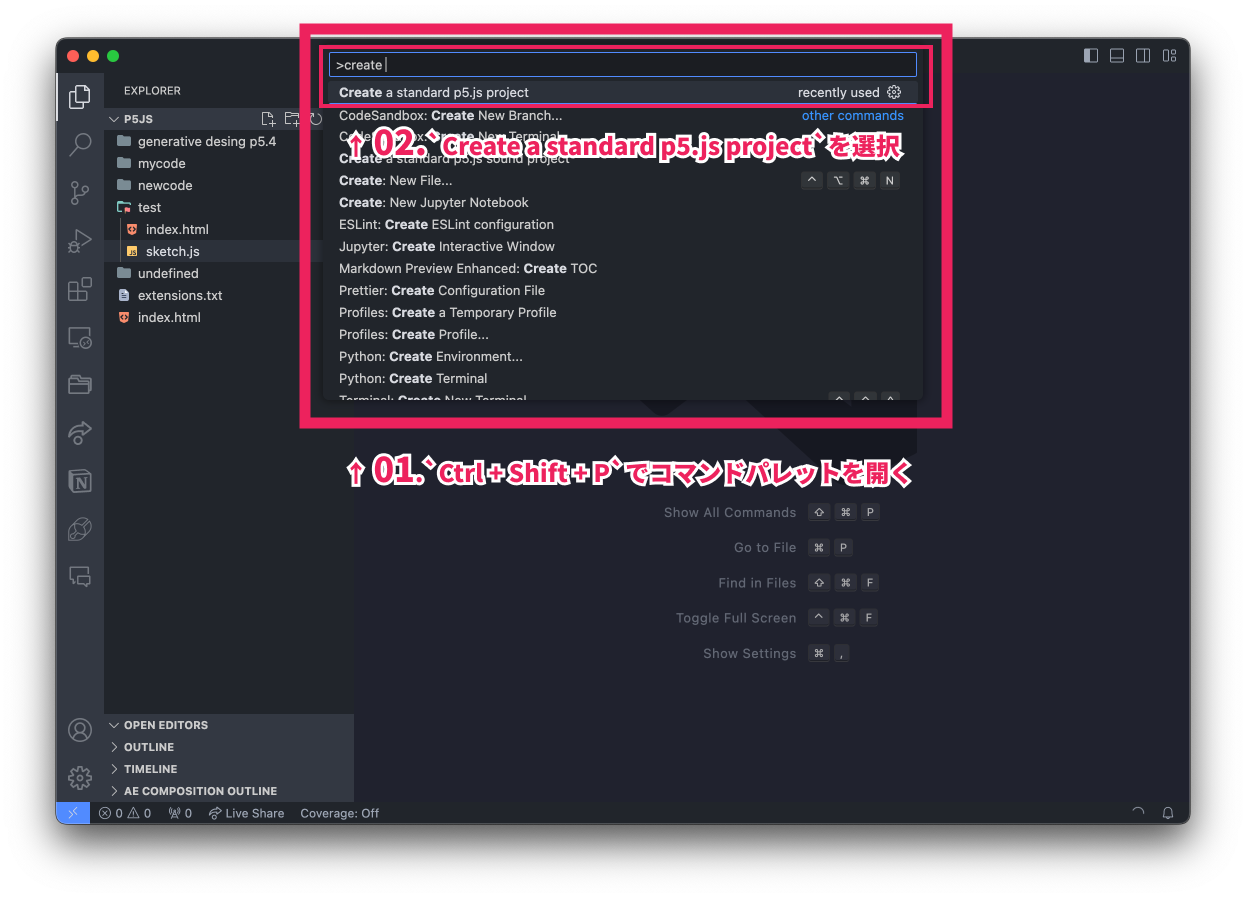
- Select
YesforDo you want to create a new directory?. - In the next input form, set the new folder name to
01_first_sketch. - For
Do you want to use a local or a hosted version?, selectHostedto complete the creation of the new p5.js project.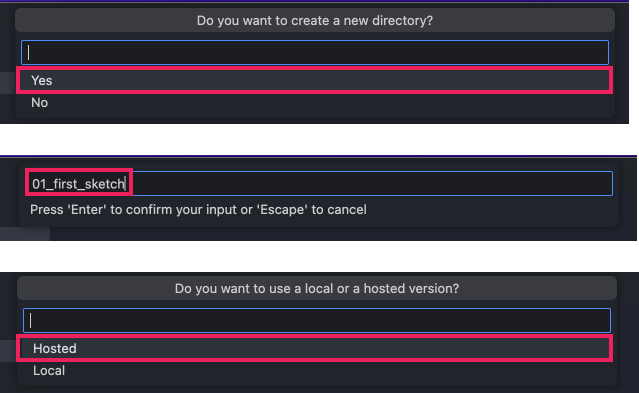
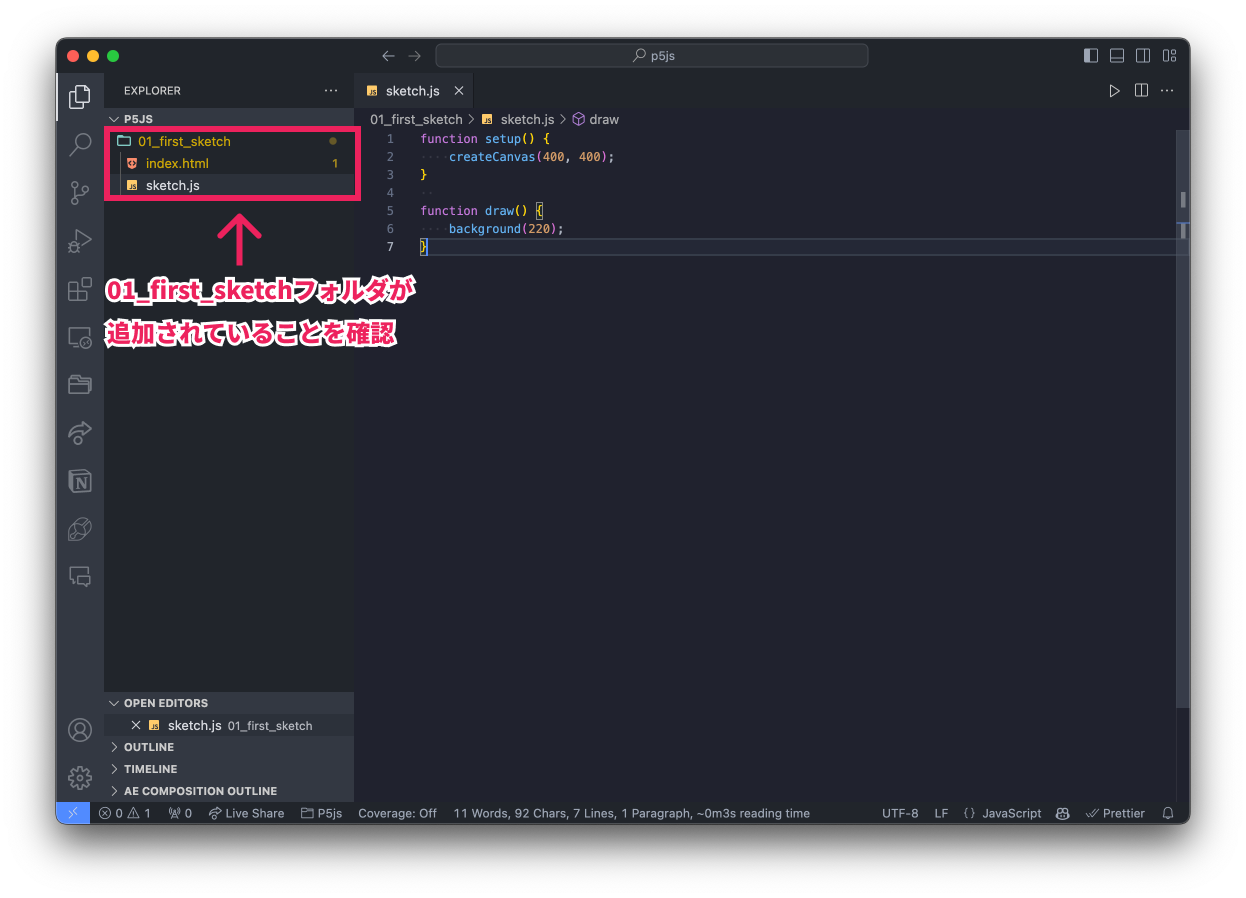
This will add a folder named 01_first_sketch. Confirm that the folder named 01_first_sketch is displayed in the left folder panel of VSCode.
Displaying the p5.js Live Preview
Click the 01_first_sketch folder and open the sketch.js file inside to view the code.
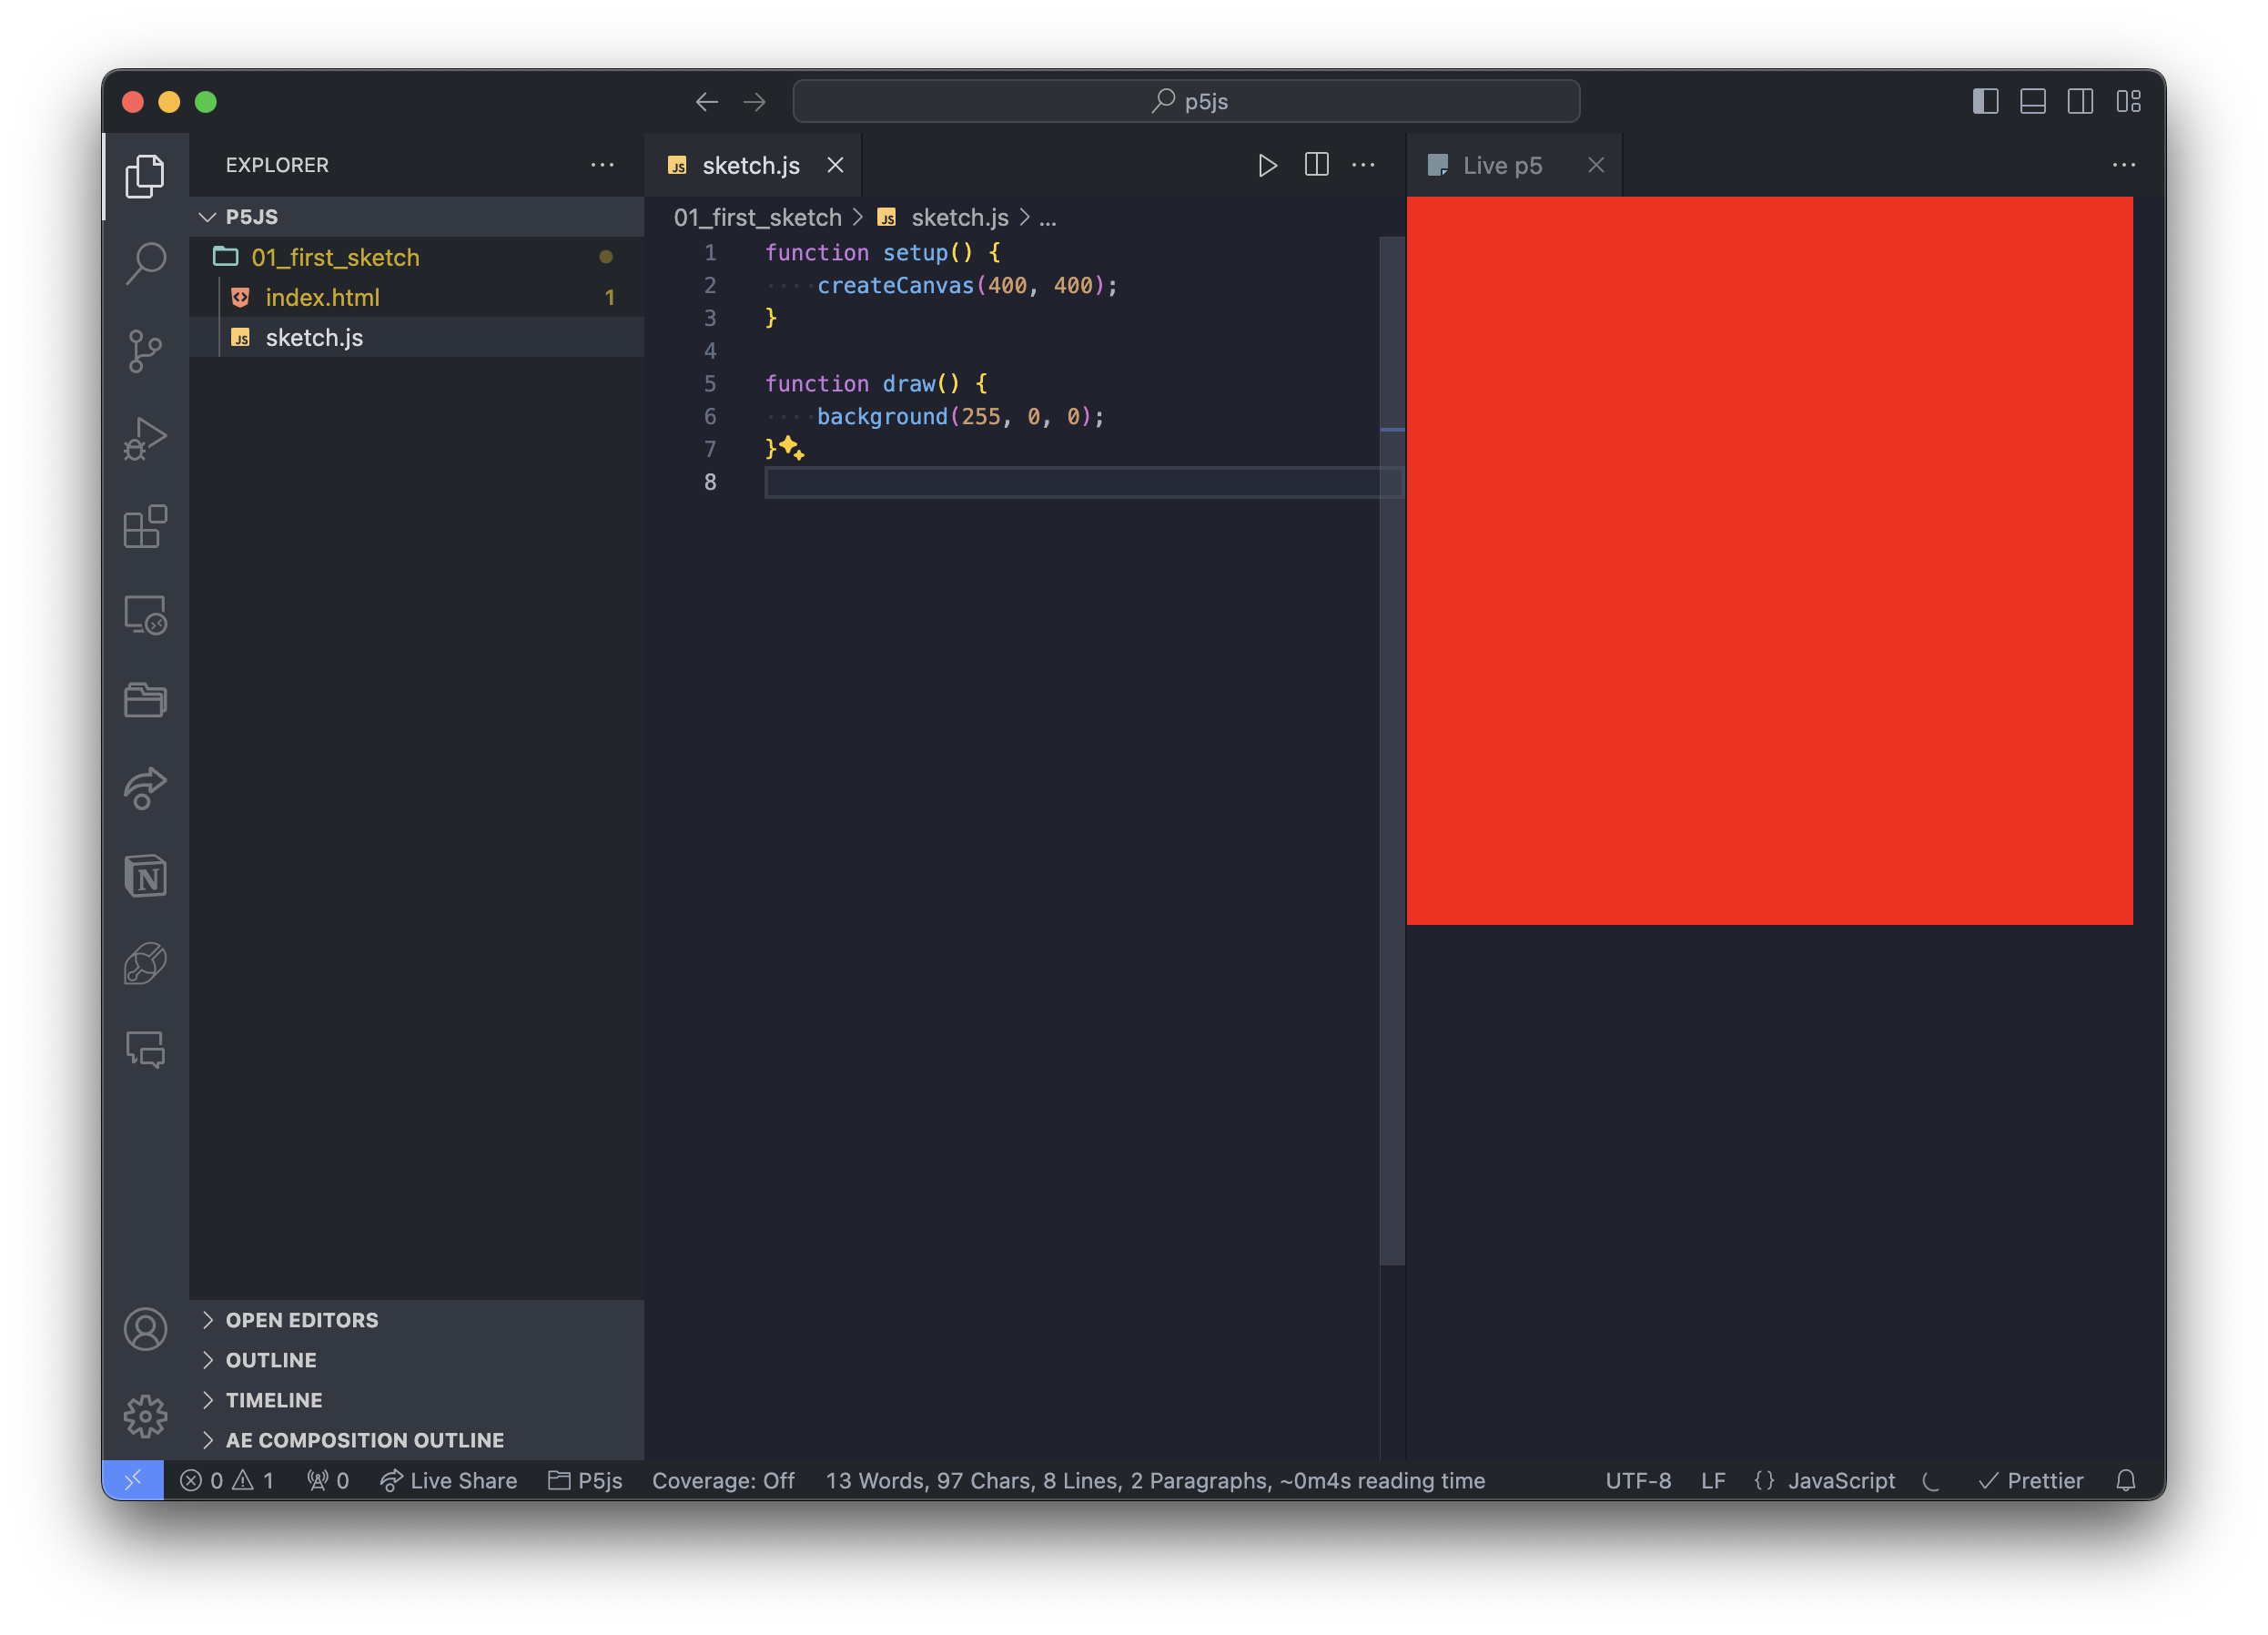
Next, open the command palette again with Ctrl + Shift + P, type Open live p5 panel, and press Enter to select the command. This will display the p5.js live view in the right panel.
Try changing the line background(220) in the sketch.js code to background(255, 0, 0). If the display in the right panel turns red, it was successful!
Congratulations! You now have all the tools you need to bring your ideas to life, whether it's games, animations, or interactive art. In the next chapter, we will learn the basic features of p5.js!